DIY Cat Shelves
Most popular questions
Making a cat shelf can be easy! Think free carpet scraps or old rugs, wood planks cut by employees at stores like Home Depot… after all, if the shelves are sturdy and aesthetically pleasing, you and your cats will be happy! All you need is a space to put them and mounting hardware.
CONFIGURATION
Where to mount shelves to the wall really depends on your space. On average, mine are vertically spaced about 13 inches apart and the horizontal gaps vary from 1 foot to 3.5 feet in between. My 10 year old tabby cat has no problem jumping a 3.5 foot gap across my doorway.
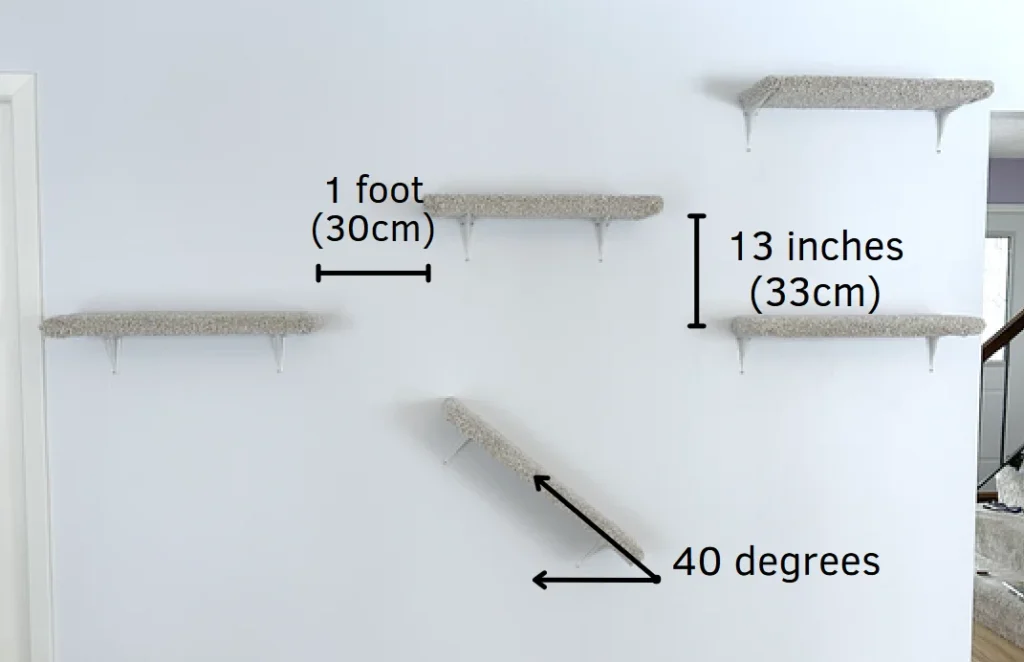
Shelves at an angle should be set at no more than 40 degrees to the floor.
Be mindful of sharp or dangerous objects underneath shelves that your cat could fall on top of.
There really is no right or wrong way to set up shelves… Your cats will like them regardless!
MATERIALS
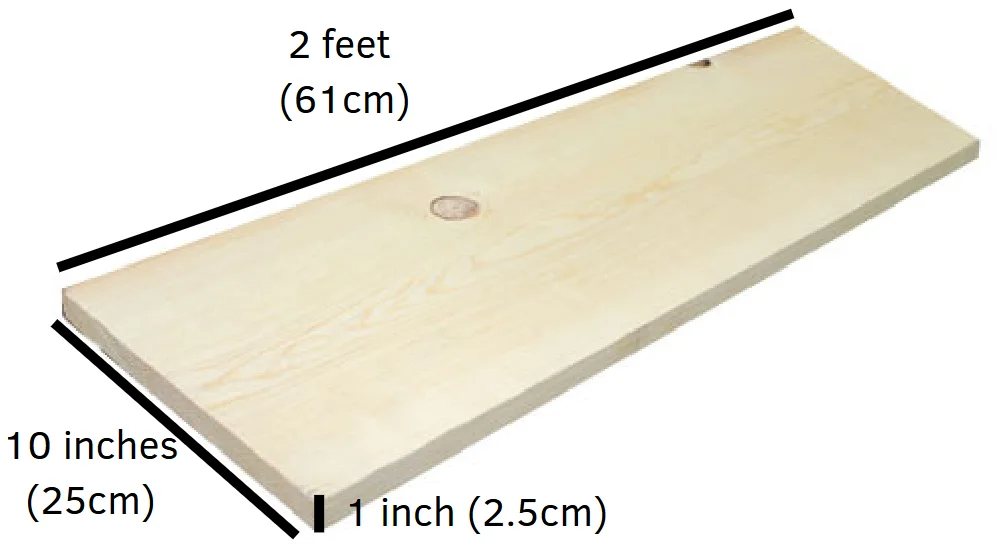
- 1×10 planks or wider
Cut to 2 foot lengths (or however long desired) – employees at stores like Home Depot can cut them for you!
My shelves are made from wood planks because it is the cheapest material available that comes already cut to the width I want. That said, any plywood or composite material will work just fine. You can save money by buying a large sheet and cutting it to the desired lengths and widths.
I recommend a shelf that is at least 10 inches wide to allow enough space for your cat to run and jump without slipping off.
Mine are often cut to 2 foot lengths which allows enough space to be able to reach two studs most of the time.
SHELF COVERING
- Indoor or outdoor carpet
- Utility knife for cutting carpet
- Spray adhesive
-
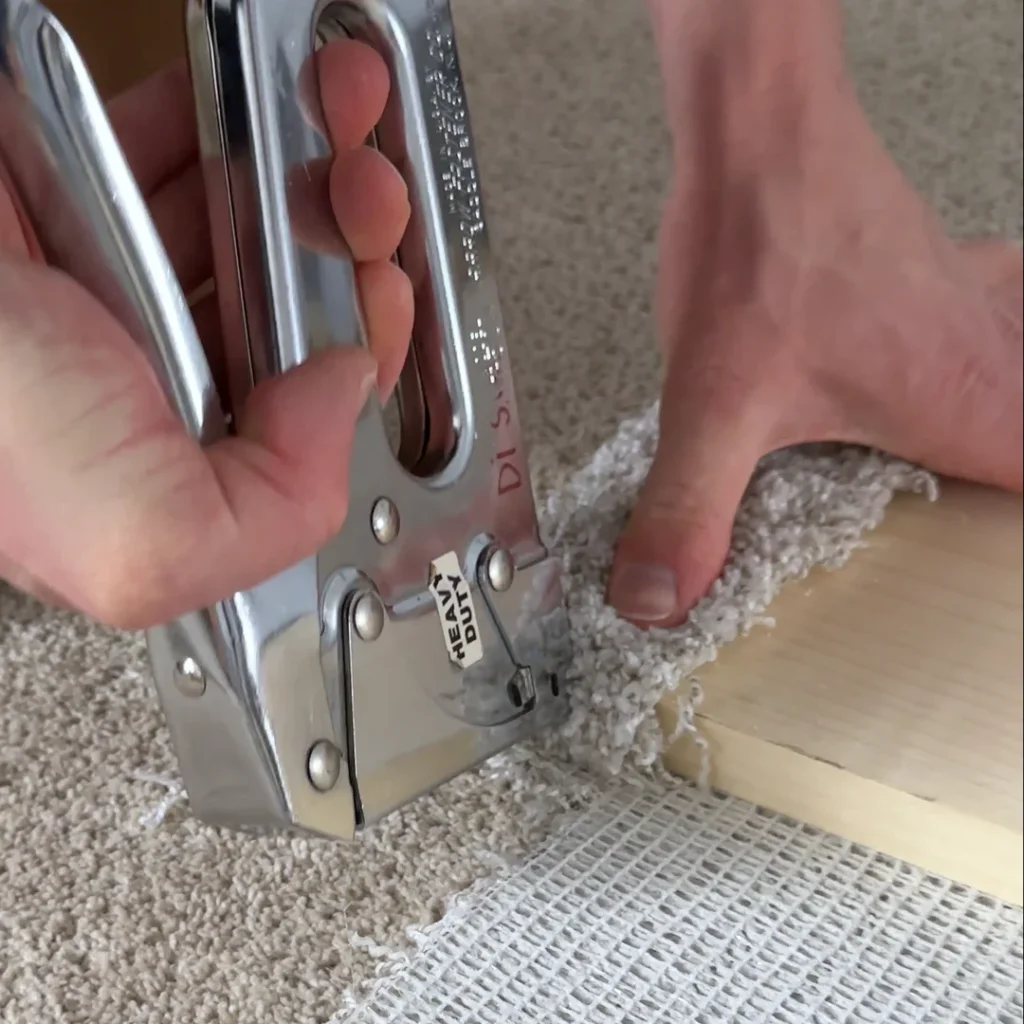
Heavy duty staple gun if wrapping the carpet around the edges and bottom
- Length of staple doesn’t matter as long as it secures the carpet
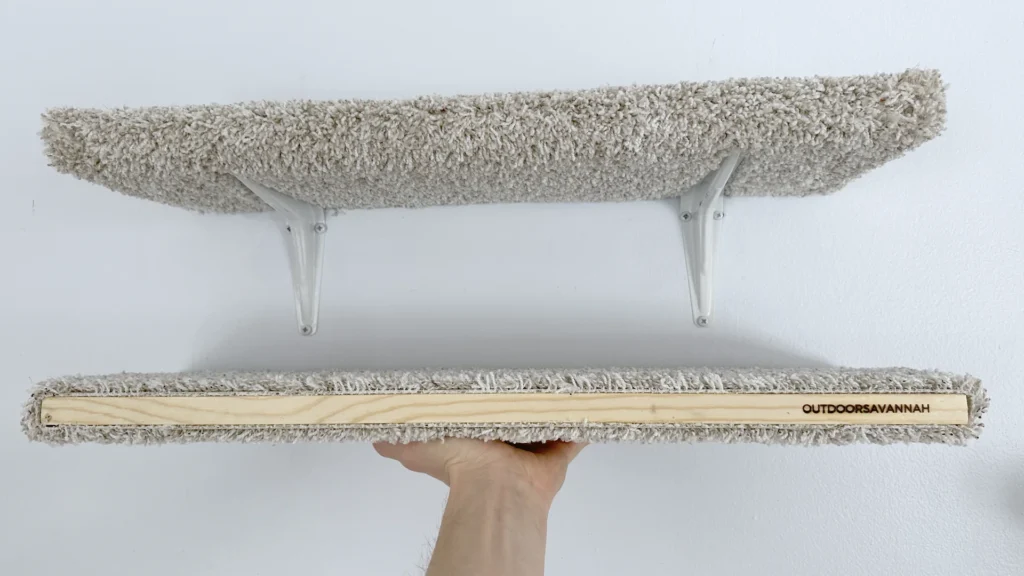
The shelf must be covered in a material that allows your cat to get grip if they are going to be able to quickly maneuver on them or if they are mounted at an angle. Mine are covered in a high pile carpet because it was leftover from doing my home. Any interior or exterior, low or high pile carpet or even a doormat material will work as long as your cat can sink their claws into it. Felt and other fabric materials do not work as they are most often too thin.
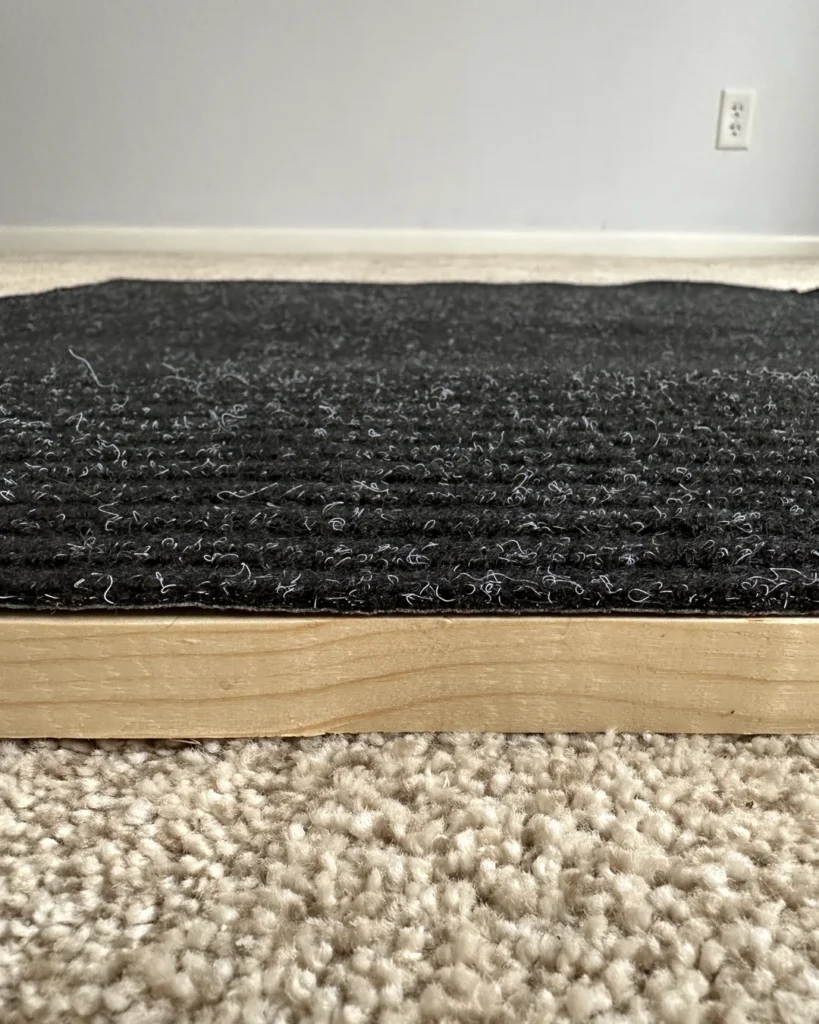
Attaching the carpet to the shelf can be done by using a high quality spray adhesive. The spray adhesive bonds the carpet to the top side of the shelf where your cat is running across. Avoid using staples on the top side for safety reasons. The spray adhesive I use is Super 77 by 3M.

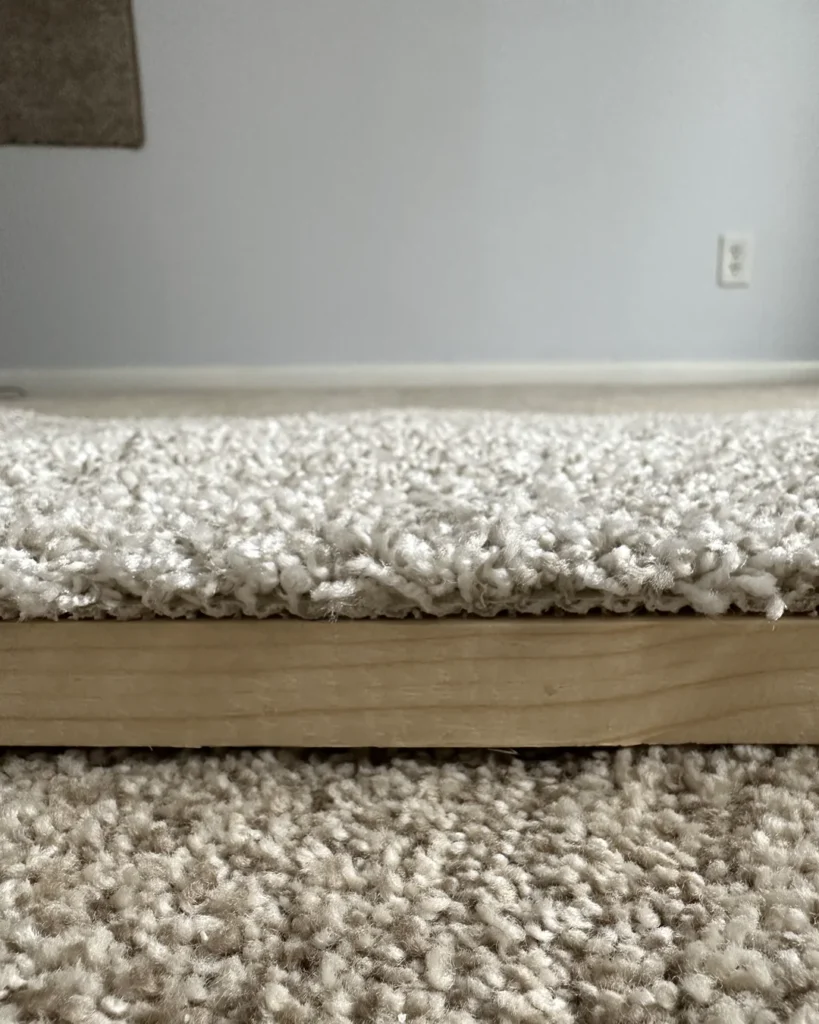
Wrapping the carpet around the shelf edges and bottom is optional and done using staples. I think my cat likes having the carpet wrap around the edges so she is able to grab it more easily when climbing up but by no means is it required. In addition to the edges, having the carpet run over the entire bottom side serves no utilitarian purpose other than aesthetics. If you wish to wrap the carpet around the shelf, staples can be used on the bottom side to secure it.
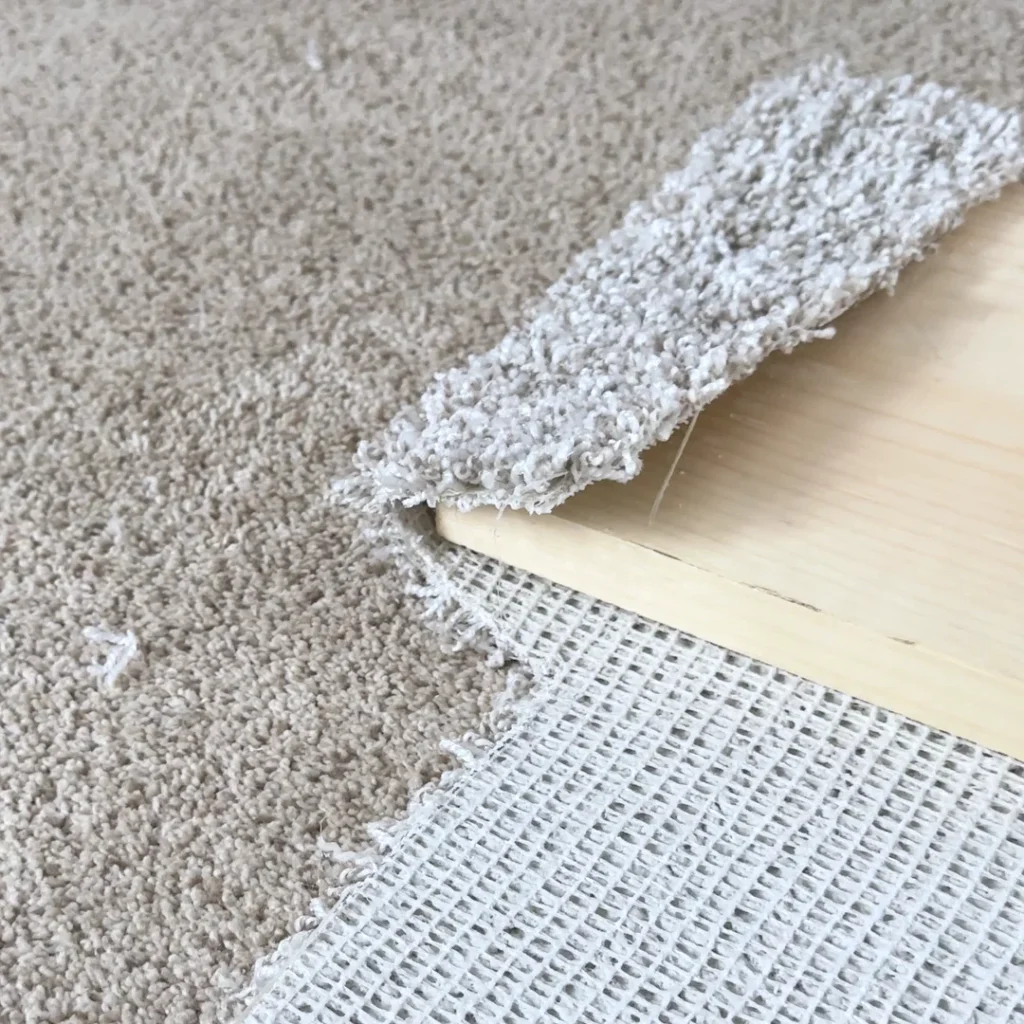
Once the carpet is folded over and stapled,
a piece with angled edges is cut out of the corner
The upper angled edge is folded in and stapled
allowing the lower part to fold over top
Short video showing how I cover my shelves
MOUNTING HARDWARE
- Shelf brackets rated for a high weight capacity
- Toggle bolt anchors
- Stud finder
- Small pan-head screws
The shelves are mounted to the wall using L brackets. Mine are inexpensive yet rated for a high weight capacity and can support up to 80 lbs when installed in studs. You should avoid using thin brackets with no support in the corner. The reason I use brackets as opposed to making floating shelves is simply because it’s easier. I wanted to quickly and easily set up a fun and enriching environment for my cats.
The brackets are secured to the bottom of the shelf using small pan-head screws. How these are mounted to the wall depends on what type of wall you have.
DRYWALL (HOLLOW WALL)
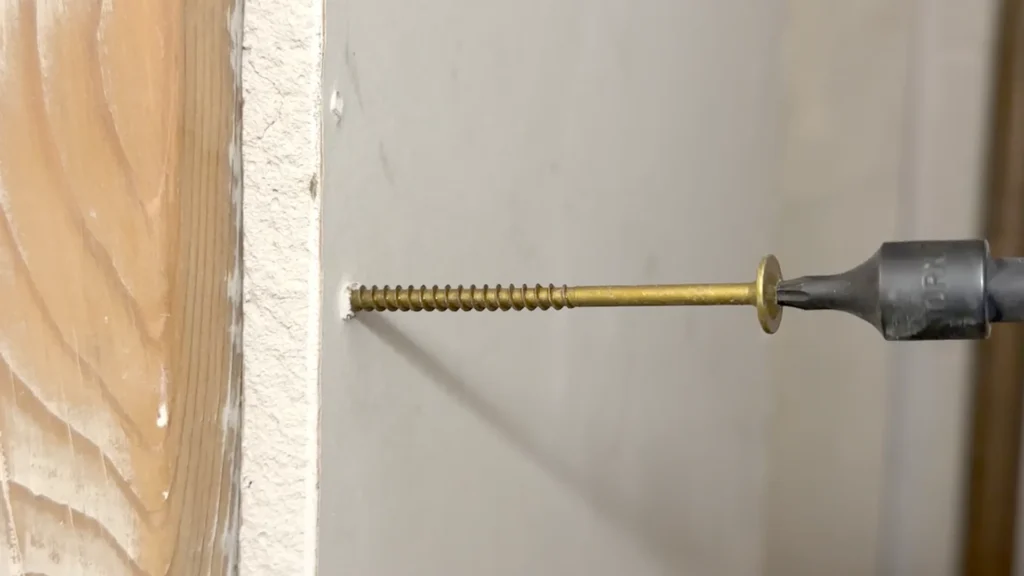
For drywall (or plaster) applications, the best way to mount the brackets to your wall is by drilling long screws into the wall stud. Studs are typically placed every 16 or 24 inches and located using a stud finder.

If you must install where two studs are not available, toggle bolt anchors are sufficient. These anchors have a ~2 inch flange that opens up behind the drywall and are rated for very high weight capacities because weight gets distributed over the entire length of the flange behind the wall.
**Avoid using plastic plug or screw-in type anchors. The plugs will pull out while screw-ins will weaken and damage the surrounding drywall over time.
BRICK OR CONCRETE (SOLID WALL)
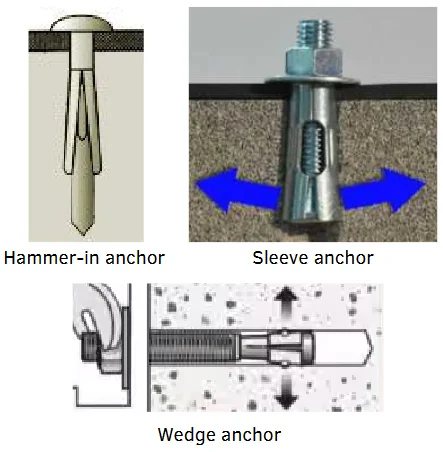
There are numerous types of anchors that can secure brackets to a solid wall including hammer-in anchors, sleeve anchors or wedge anchors. I don’t have this type of wall and have no experience with using these types of anchors.
CONCRETE/CINDER BLOCKS
(HOLLOW BLOCK)
In addition to the previously mentioned anchors for solid walls, brackets can additionally be mounted using toggle bolt anchors into hollow blocks.
RESOURCES
Longer video detailing my process:
Collection of my DIY Cat Wall short videos:
DIY CAT WALL INSPIRATION
Zen By Cat has built the most impressive array of cat walks you will ever see in their ‘House of Nekko’ which houses 30 cats. They are also on YouTube
MeloCat has completely adapted their apartment for living with 10 cats, also on YouTube